
Mostly nesting is automatic, but sometimes you need that extra bit of control to do jobs that are out of the ordinary such as samples or prototypes or you just want to get more from each nest.
In this article, I’ll tell you about nesting explorer and its imaginative solutions that can help you work more efficiently, giving you more flexibility and control of how the nesting is done. This extra control will help you reduce production time in the factory and save material.
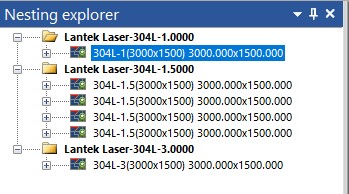
The nesting explorer is the way of organizing sub-jobs in the Lantek nesting and machining environment. It is normally located as a band on the left, although it is configurable.
The objective of the explorer is to visualize, in tree form, all the sub-jobs and nests that Lantek organizes, so that you can make decisions and optimize the combinations in the nests to suit the job, thus achieving a significant reduction in cutting length, and consequently, time and the material to be used.
Nesting explorer works semi-automatically, organizing itself to match the nests that you create either when you do it automatically with the "do all" function, selecting sub-jobs to be included in "active sub-job" or you just do it with the “one sheet” function, if you prefer to do one nest at a time.
In either case, the browser will arrange everything as the following example.
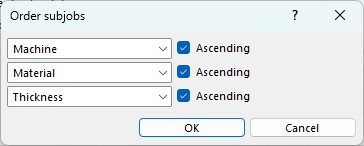
● Machine - Material - Thickness
○ Sheet metal - Format
■ Product 1
■ Product 2
For example:
● Punching machine 1 - Inox - 2mm
○ Ref. Sheet metal - 3000x1500
■ Product 1
■ Product 2
○ Ref. Sheet metal - 3000x1250
■ Product 1
● Punching machine 1 - Galvanized - 1.2mm
○ Ref. Sheet metal - 3000x1500
■ Product 3
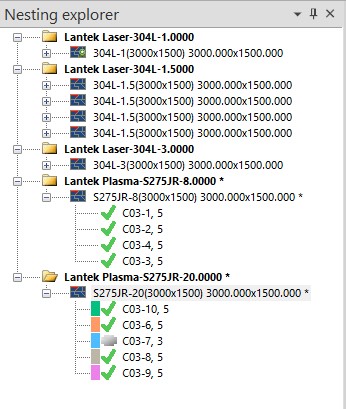
The nesting explorer works autonomously, representing the sub-jobs and their nests. In fact, when you click on "do all", Lantek starts this complex task, which requires a large number of calculations to achieve optimal nesting. The results are represented in the explorer, one after the other.
If you have correctly configured your Lantek installation for your production environment, and you have properly defined the criteria both for your machines and raw materials you use, the "do all" function will leave the job almost 80% done. This is why it is so important to invest the time it takes to get your Lantek software fully configured on installation.
If, despite everything, you are a bit of a control freak (as I am), and you prefer to control what Lantek does and how you want the work to develop, you can interact directly with the nesting explorer and with the contextual menus that appear every time you right-click on an element in the explorer.
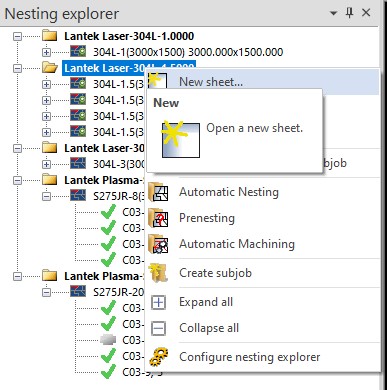
When you right-click on a sub-job, which is the one with "Machine - Material - Thickness" and usually appears with a bolder font, the following appears:
Apart from the sub-job context menu, there is also another context menu for nesting, which is the one that appears as “Sheet - Format”. Clicking on it, the following appears:
It is intuitive and practical. With the nest explorer you will have a very intuitive and easy-to-use interface, which will allow you to create nests quickly and easily. While giving you control and flexibility when you need it.
It has complete tools at the click of a button. From the explorer, you will be able to use tools such as automatic or manual nesting, redo sheets, machining, etc. Advanced features that will save you tons of time at work and you can view the results of your changes in real time.
With the explorer, you will have a map of everything giving you complete control of how the parts will be cut. This will allow you to make decisions on the most effective, optimal and productive methods, before sending them to the cutting and punching machines.
That’s all.
I hope you liked the article and were able to discover new things about the nest explorer. Good luck and see you again in the next one.
.png)